Using Thunderforest in your apps
Thunderforest makes available a great set of mapping web services based on OpenStreetMap. They support the standard x/y/x tiles schema and better still usage is free for hobby or solo projects. This tutorial will run you though setting up an account and then adding the appropiate map to your app.
Background
Thunderforest morphed out of the OpenCycleMap project by talented cartographer Andy Allan. The platform is based on open source components including mapnik and OpenStreetMap. Pricing is very reasonable, especially for home users (i.e. free!). It is simple process to create an account and add the respective map service to your app. The key map styles of interest to the off-road naviagation community are the 'Outdoors' and 'Landscape' styles.
Create an account
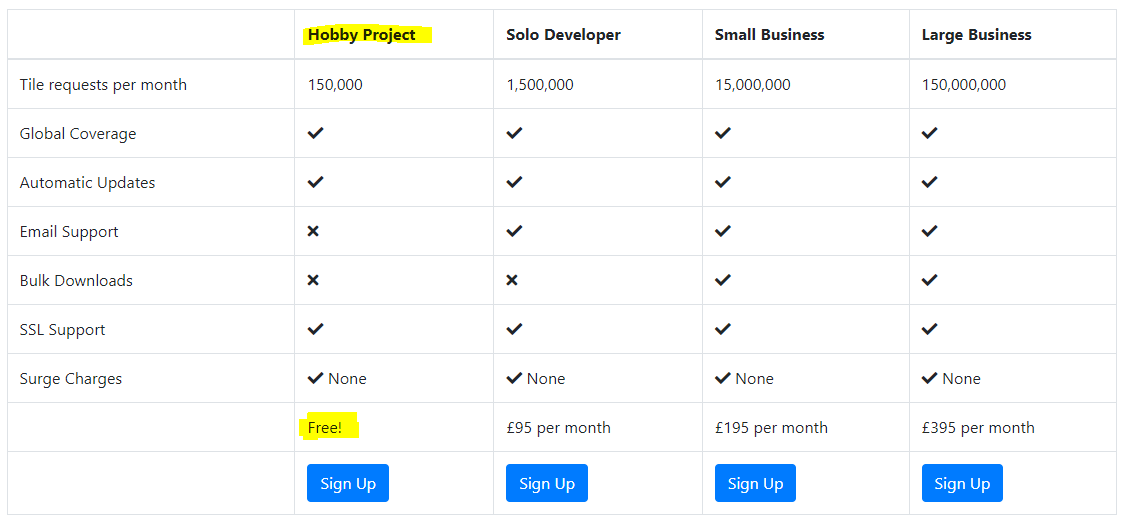
Go to the pricing page and select the appropiate plan. In most cases the 'Hobby Project' will be sufficent so click on Sign Up.
Enter your details and click Create Account. Yuu will receive an email to confirm your account and will take you back to the Thunderforest Console. You will need to log in again and you will this screen
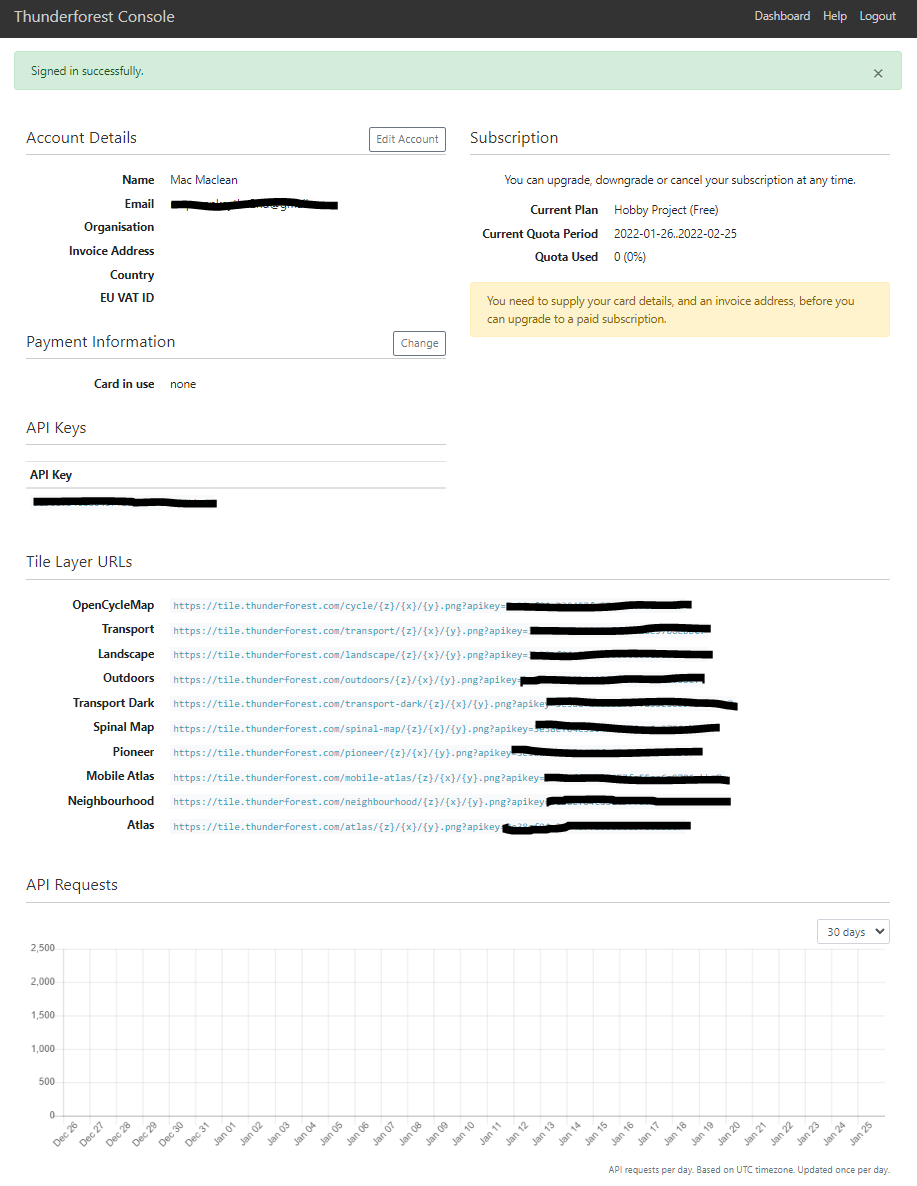
Note the Tile Layer URL's with unique API keys. Now we have all the information we need to add to our app. With the Hobby Project plan you get 150,000 tile request per month. That is very generous and you would be hard pressed to exceed that (unless you caching the tiles for offline use and that is not supported in the 2 lower plans).
Add to Nakarte
To add a Thunderforest map to Narkate we need to add a new layer. Click on the Add Custom Layer icon on the Layer dialog (top right of web browser).

You will see the following dialog.
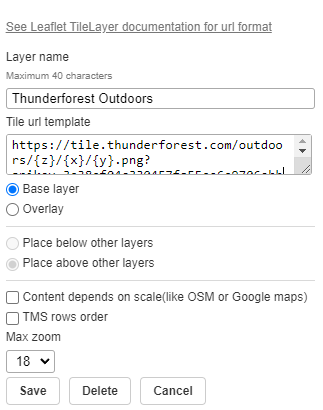
Add a Layer name In this case Thunderforest Outdoors, and copy and past the appropiate Tile Layer URL from your Thuderforest Console. For example:
https://tile.thunderforest.com/outdoors/{z}/{x}/{y}.png?apikey=xxxxxxxxxxxxxxxxxxxxxxxxxxxxxxx
In this case I have added the Thunderforest Outdoors tile schema. You can choose to add the layer as a Base Layer or as an Overlay. Click Save.
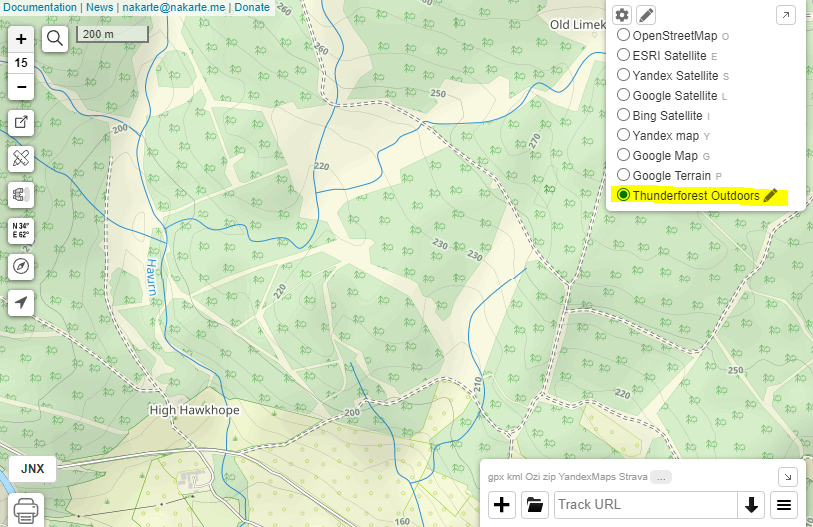
You can view the added map layer by selecting it in the Layer dialog.
Add to Guru Maps
Thunderforest pre-configured in Guru Maps Pro.
After creating this tutorial I realised that Thunderforest is preconfigured as part of the Guru Maps Pro app. It is still applicable to the Guru Maps. A similar process can also be used for other apps such as OsmAnd, Locus Maps and Alpine Quest
Guru Maps allows you to view online mapping web services on your Apple or Android device. To add a Thunderforest mapping style to Guru you first need to create a configuration file. Here is an example for OpenStreetMap.
<?xml version="1.0" encoding="UTF-8"?>
    <customMapSource>
    <name>OpenStreetMap</name>
    <url>http://{$serverpart}.tile.openstreetmap.org/{$z}/{$x}/{$y}.png</url>
    <serverParts>a b c</serverParts>
</customMapSource>
For Thunderforest Outdoor we would use the following (replacing the xxxxxxxxxxxx with your unique API code). Note that we have removed the serverParts line.
<?xml version="1.0" encoding="UTF-8"?>
    <customMapSource>
    <name>Thunderforest Outdoors</name>
    <url>https://tile.thunderforest.com/outdoors/{z}/{x}/{y}.png?apikey=xxxxxxxxxxxxxxxxxxxxxxxxxxxxxxx</url>
</customMapSource>
The upload the newly created configuration file the appropiate folder on your device.
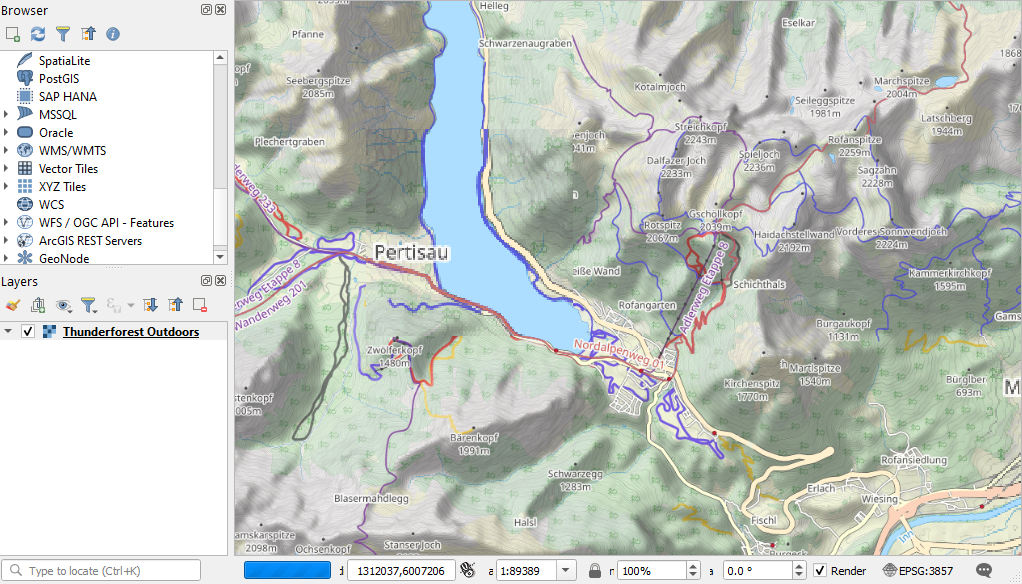
Add to QGIS
We can also add the Thunderforest styles to QGIS.
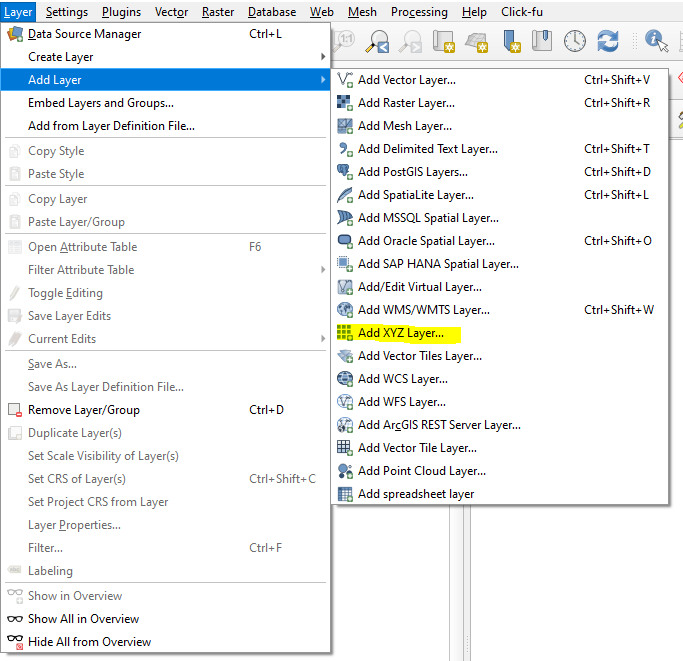
Open QGIS and open the Add XYS Layer from the Layer menu
Click on New and enter the relevant details (replacing the xxxxxxxxxxxx with your unique API code).
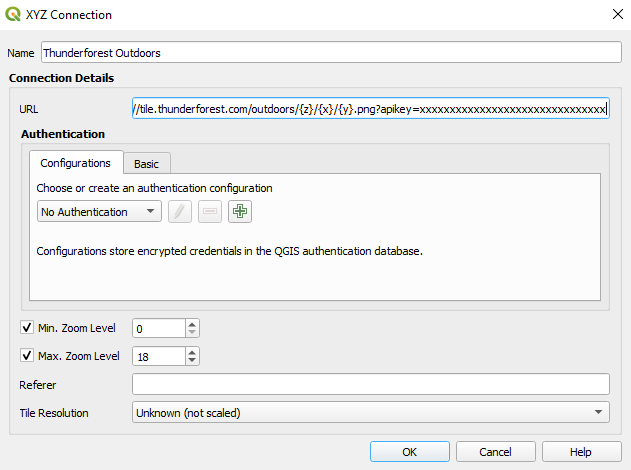
Clik OK then click Add to add layer to map.